
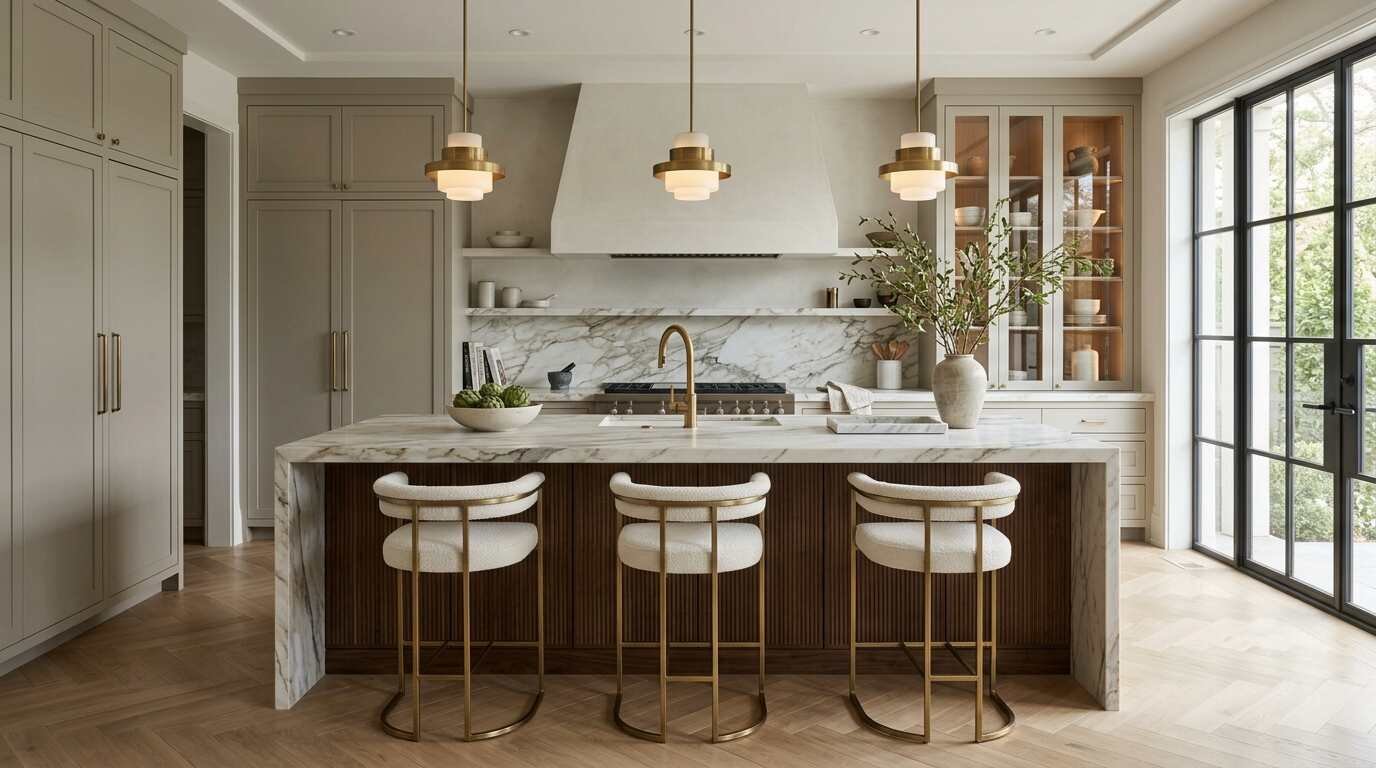
A kitchen island is much more than a prep surface. It acts as the visual centerpiece of the room, gathering guests, organizing daily prep, and defining the flow of your entire layout. In a well-planned kitchen, the island can bring the cabinetry, countertops, and lighting together. It should also support the way you cook, eat, and spend time with family or guests.
Choosing the right design requires balancing visual appeal with daily function. A massive stone island might look breathtaking, but it must also offer comfortable seating, useful storage, and clear pathways around surrounding counters.
In this guide, I share 11 practical luxury kitchen island ideas to help you elevate your space. Whether you are planning a complete renovation or refining an existing layout, these concepts combine premium materials with smart spatial planning. For more inspiration on designing an elevated home, explore my complete guide to luxury kitchen ideas.
11 Luxury Kitchen Island Ideas for an Elegant Kitchen
1. Design a Marble Kitchen Island
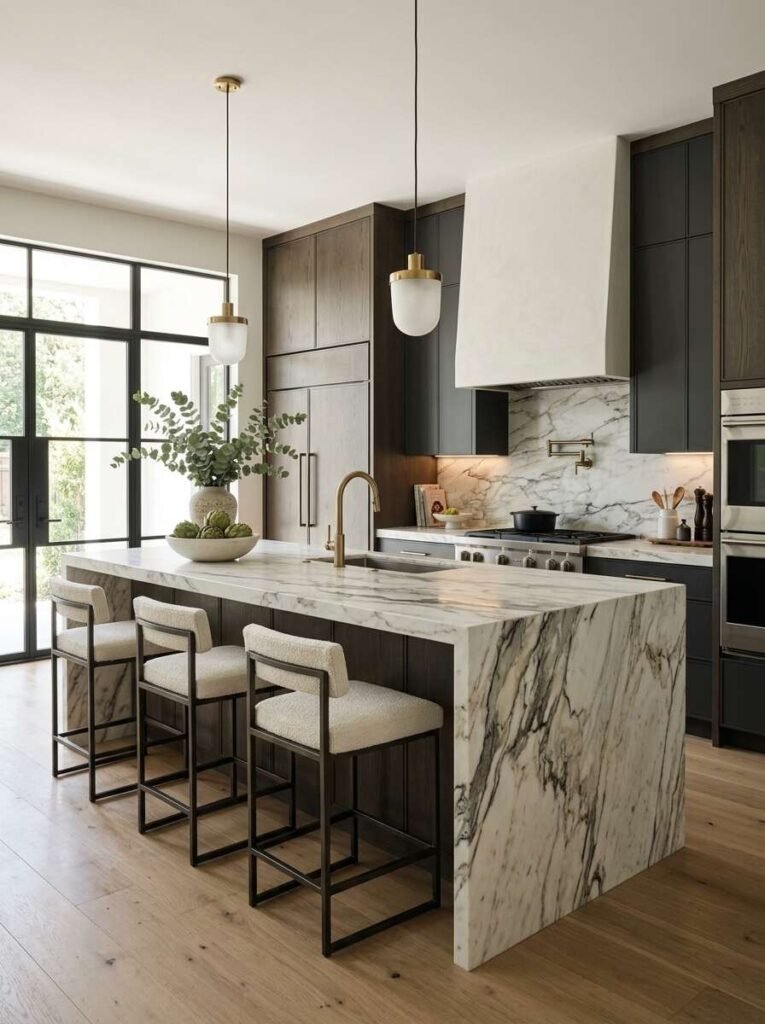
A marble island instantly establishes an elevated tone. The unique veining of natural marble creates an artistic focal point that cannot be duplicated by manufactured surfaces.
I often recommend white marbles like Calacatta or Carrara for a classic aesthetic. For bolder interiors, dramatic stones with grey, charcoal, or gold veining bring rich personality. A honed finish has a soft, matte look, while a polished finish creates more shine. Both can show signs of use, so choose the finish that best suits your style and maintenance preferences.
Keep in mind that marble is a porous natural stone. It requires regular sealing and prompt cleanup of acidic spills like wine, citrus, and coffee to preserve its beauty over time.
2. Create a Waterfall Edge Kitchen Island
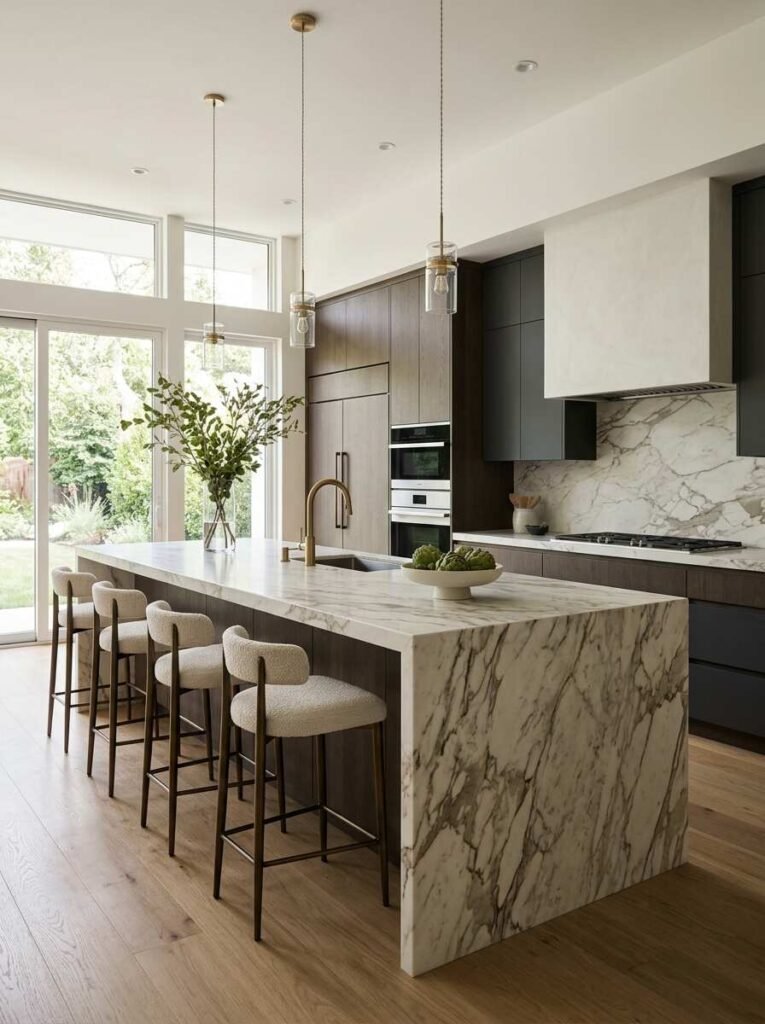
A waterfall edge extends the countertop material vertically down one or both sides of the island to the floor. This architectural detail highlights the stone’s pattern and creates a clean, continuous silhouette.
This design works exceptionally well in modern and transitional kitchens. It gives the island a clean, finished appearance and covers the cabinet sides. The exposed edges still need suitable care to help prevent chips and other damage.
Fabrication requires high technical skill. Stonemasons must precision-miter the 45-degree edges so the veining matches seamlessly as it cascades toward the floor.
3. Choose a Warm Wood Kitchen Island
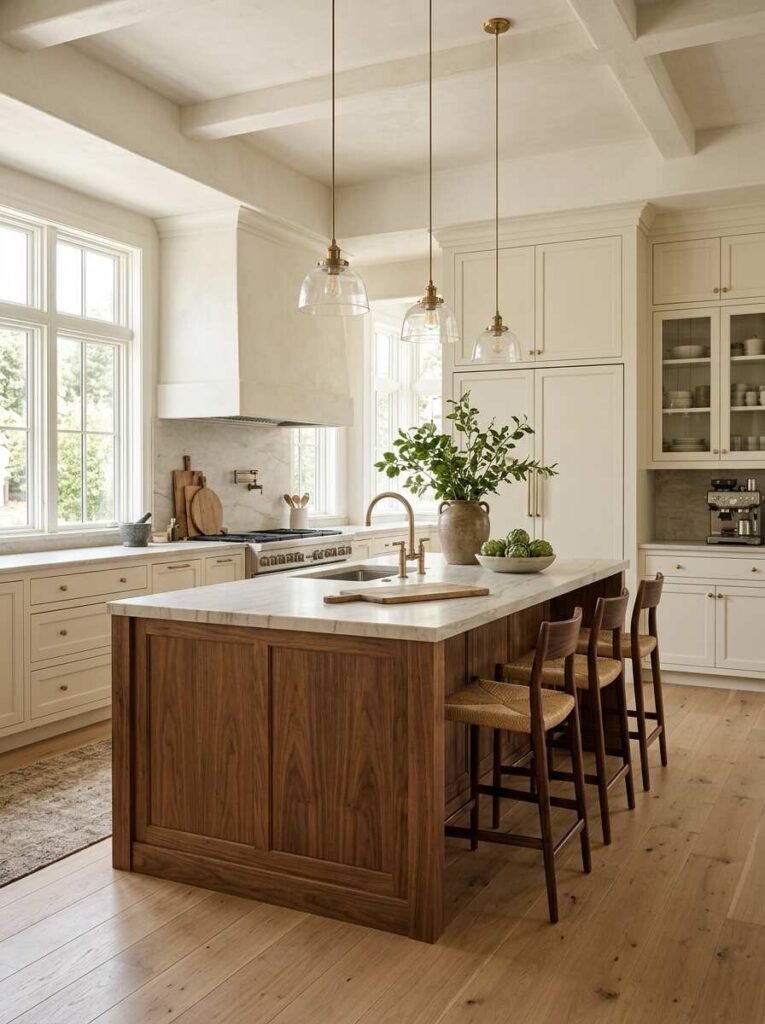
Introducing natural wood cabinetry to your island brings organic warmth into stone-heavy spaces. Species like rift-sawn white oak and rich black walnut introduce tactile grain patterns that soften surrounding surfaces.
A warm timber island pairs beautifully with light stone tops and cream perimeter cabinets. The contrast prevents white or grey kitchens from feeling cold or sterile.
I recommend choosing a suitable protective finish that keeps the wood grain visible. The right finish can help protect the surface, but spills should still be cleaned promptly.
4. Pair a Contrasting Island With Kitchen Cabinets
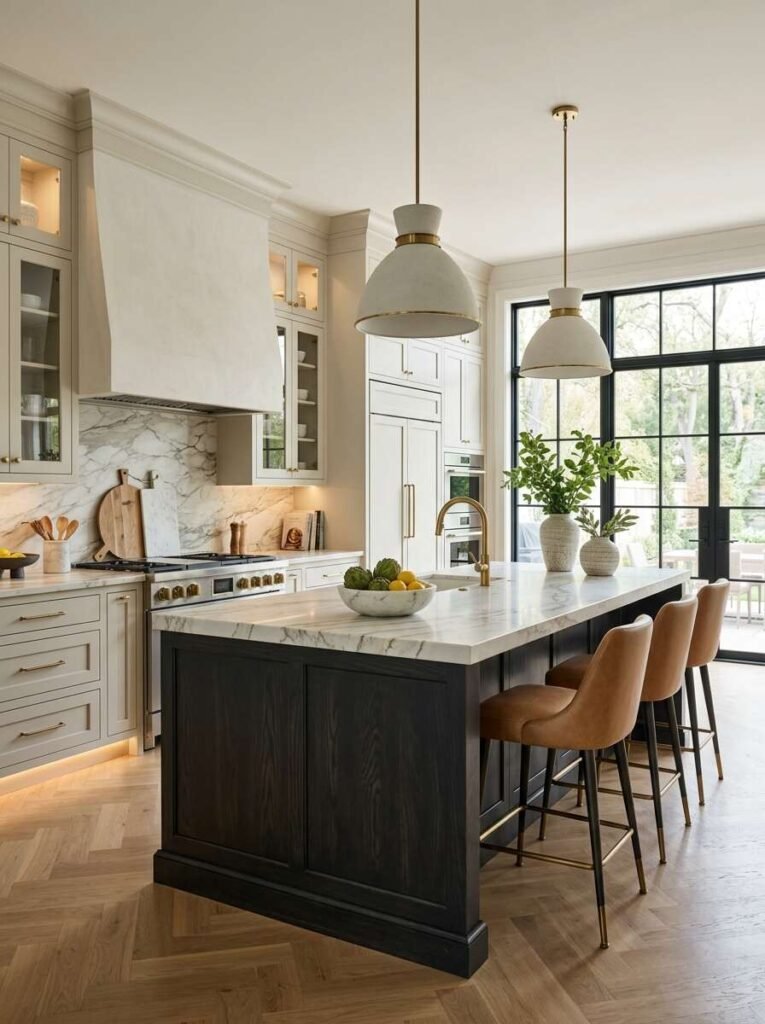
Using a contrasting finish for your island breaks up large runs of uniform cabinetry, adding visual depth and architectural interest. It allows the island to stand alone as a feature furniture piece.
Popular combinations include pairing cream perimeter cabinets with a dark walnut island, or muted sage green cabinets with a white stone center. The key is maintaining a shared undertone between the two finishes.
You can tie contrasting elements together by using matching hardware, cohesive countertop materials, or consistent flooring throughout the space.
5. Add Comfortable Kitchen Island Seating
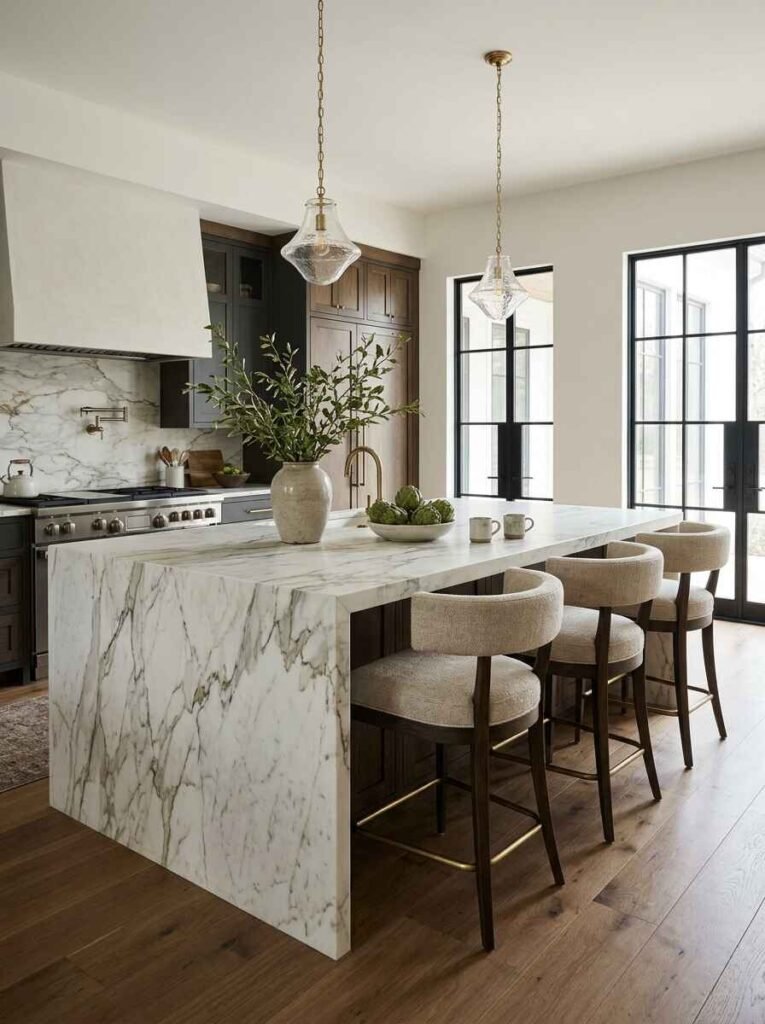
Island seating should encourage lingering over breakfast or evening conversation. Prioritizing comfort ensures your island becomes a true gathering spot rather than just a quick perch.
Choose counter stools with supportive backs, cushioned upholstery, and built-in footrests. For fabric, select performance textiles, treated wool, or top-grain leather that can withstand daily use and wipe clean easily.
Allow about 24 inches of counter width for each person. For a standard 36-inch-high counter, around 15 inches of knee space is a useful planning guideline. The required overhang and support depend on the countertop material and design, so confirm the details with your fabricator.
6. Design a Kitchen Island With Built-In Storage
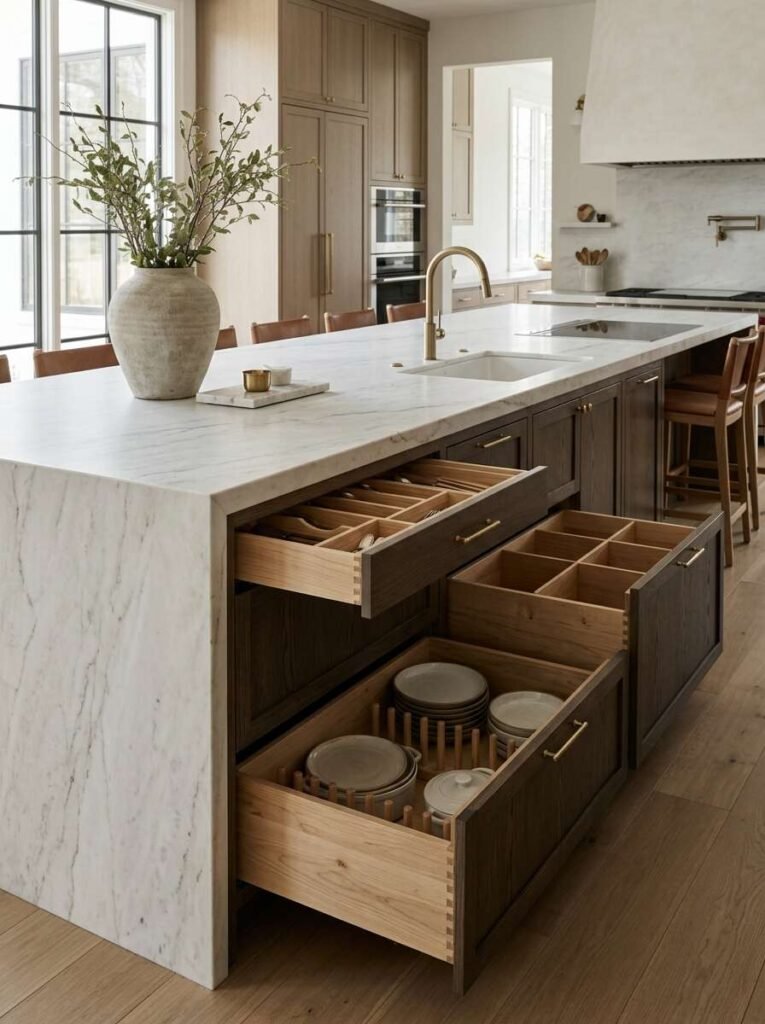
A well-designed island turns dead center space into highly efficient storage. Incorporating tailored interior organizers keeps everyday preparation tools exactly where you need them.
Consider deep drawers for pots, pans, and serving dishes. They can make items easier to see and reach, while cabinets may work better for some larger items or storage needs.
I love adding specialized inserts like wooden utensil dividers, spice racks, and peg systems for plate organization. These details eliminate countertop clutter and keep cooking routines smooth.
7. Install Pendant Lighting Above the Island
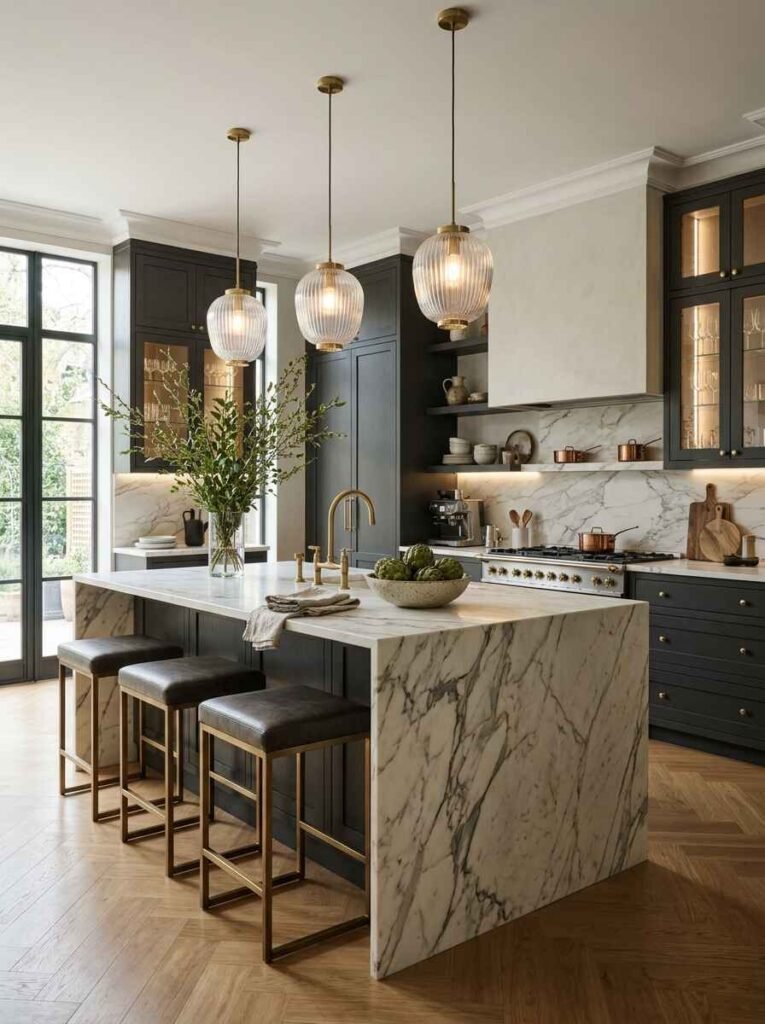
Pendant lighting above an island provides necessary task illumination while acting as decorative jewelry for the room. The right fixtures frame the island and define the visual center of the space.
Select pendants that fit the overall scale of your island. Choose fixtures that suit the island’s length and the room’s scale. Two larger pendants may work well on some islands, while three smaller fixtures may suit a longer surface. Keep spacing and sightlines in mind.
A common starting point is about 30–36 inches between the countertop and the bottom of the pendant. Adjust the height to suit the fixture, ceiling, and sightlines, and follow the manufacturer’s installation guidance.
8. Create a Curved or Rounded Kitchen Island
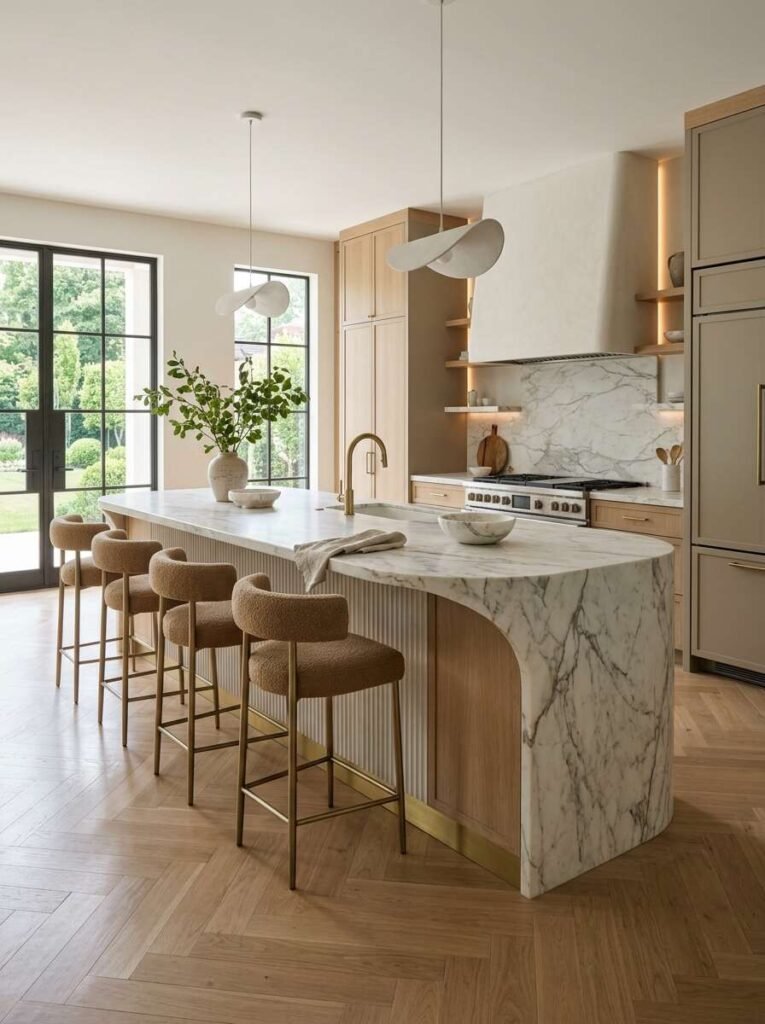
Curved island ends introduce soft movement into kitchens dominated by straight lines and sharp angles. Rounded stone countertops and fluted base panels create a welcoming silhouette.
Rounded edges remove sharp corners and can make the island feel softer. However, the overall layout still determines how easily people can move around it. It also creates a more social seating arrangement, allowing people seated at the end to face one another naturally.
Custom curved stone fabrication and radiused joinery require specialized craftsmanship, which generally increases production costs compared to standard rectangular layouts.
9. Add a Sink or Preparation Zone to the Island
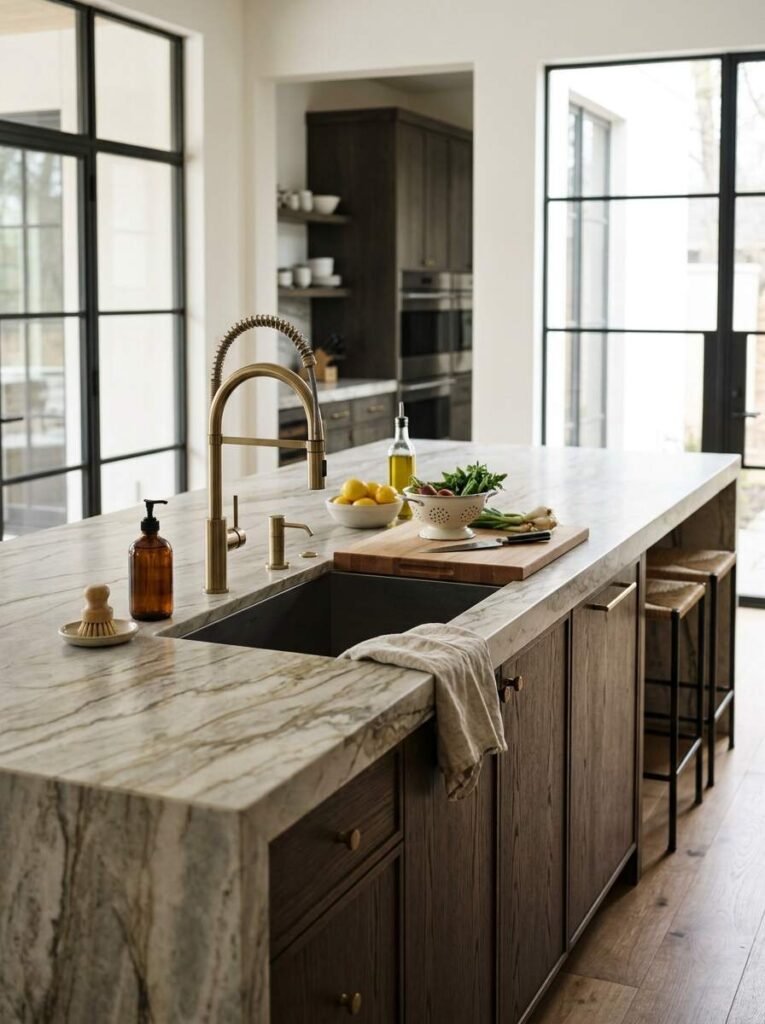
Integrating a prep sink into your island establishes a practical workstation that keeps you facing family and guests while washing produce or prepping meals.
Pair the sink with an undermount installation for easy countertop wiping. Selecting an elegant gooseneck brass or nickel faucet turns the plumbing fixture into a sophisticated accent piece.
Plan plumbing cutouts and drainage pathways during the structural design phase. Plan enough clear counter space beside the sink for food preparation and everyday tasks. The amount needed depends on the sink size, island layout, and how you use the kitchen. Confirm the landing areas and plumbing requirements during the design stage.
10. Design a Compact Luxury Kitchen Island
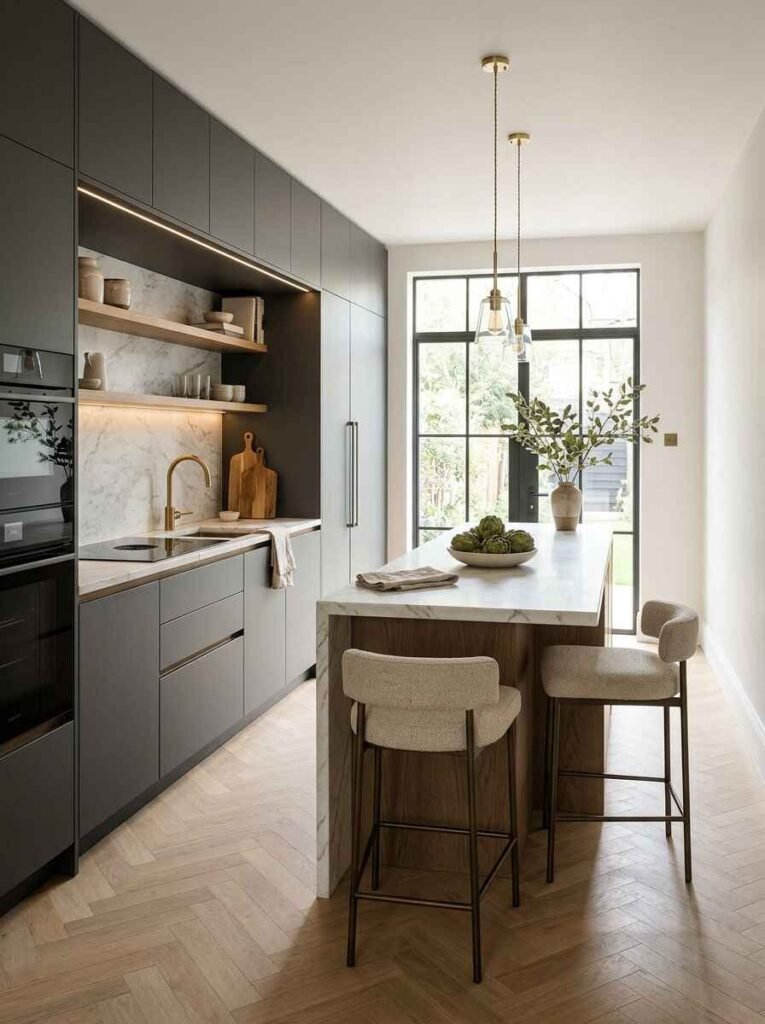
You do not need a massive room to enjoy a high-end island. A narrow, carefully proportioned island brings functional prep space, storage, and style to compact kitchen layouts.
Focus on a streamlined profile that maintains clear walkways around all sides. Slim overhangs paired with low-profile, backless bar stools provide quick seating without blocking pathways.
Use practical drawer organizers and a recycling pull-out if the island has enough room. Choose storage features that fit your needs without reducing useful counter space or blocking movement.
11. Choose a Multi-Functional Kitchen Island
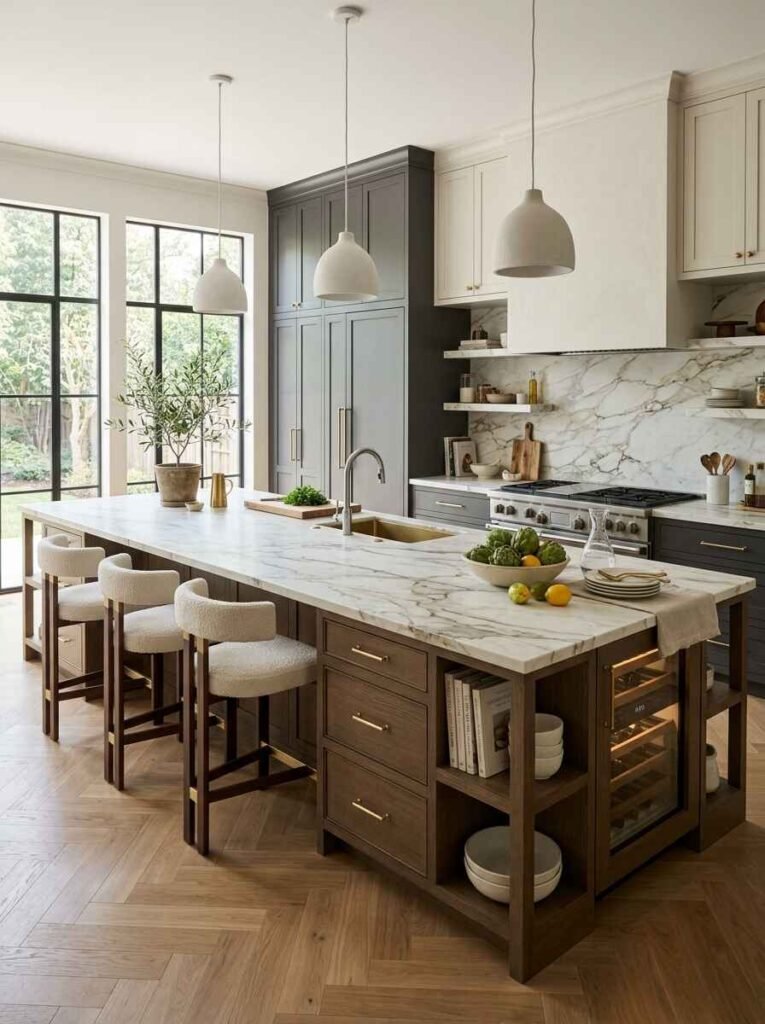
In open-plan homes, a multi-functional island bridges the gap between cooking, dining, and entertaining zones. It combines multiple daily activities into one central architectural element.
Incorporate distinct zones along the counter: reserve one end for food preparation and cooking, and dedicate the opposite end to guest seating and serving.
Adding integrated under-counter wine cooling or open end-shelving for cookbooks maximizes utility while keeping essential items close at hand.
How to Choose the Right Kitchen Island Layout
Selecting the right island design depends on your room’s physical dimensions and daily routine. Here are practical steps to guide your layout planning:
- Measure Clear Walkways: Plan the clearance around the island according to how the kitchen will be used. About 36 inches may work for some walkways, while working aisles often need around 42 inches for one cook and 48 inches for two cooks. Check appliance doors and local requirements before finalizing the layout.
- Verify Door Clearances: Check that dishwasher doors, oven fronts, and refrigerator drawers can open fully without striking the island base or seating.
- Determine Primary Purpose: Decide whether your priority is food preparation, informal dining, secondary storage, or entertaining.
- Plan Electrical and Plumbing Early: Floor outlet placement and plumbing lines must be slab-routed before flooring installation begins.
- Harmonize Finishes: Ensure island stone, wood species, and metal hardware complement your perimeter cabinetry and architectural trim.
Kitchen Island Design Mistakes to Avoid
- Over-Sizing the Island: Installing an island that is too large restricts natural movement, making the kitchen feel cramped and awkward.
- Crowding Walkways: Leaving too little space around the island can make it difficult to move between work areas. Check the aisle width, appliance doors, and space needed by people working or sitting nearby.
- Ignoring Material Maintenance: Choosing high-maintenance porous stone for heavy-use family islands without committing to regular sealing leads to staining.
- Over-Complicating Finishes: Combining too many contrasting materials, bright metals, and bold wood grains creates visual chaos.
- Overcrowding Functions: Trying to fit a primary cooktop, main sink, trash pull-out, and seating onto a modest island leaves no usable prep space.
- Neglecting Task Lighting: Relying only on decorative pendants without adequate under-cabinet or recessed task lighting creates dark work areas.
Frequently Asked Questions
What Makes a Kitchen Island Look Luxurious?
A kitchen island looks luxurious through high-quality materials, bespoke cabinetry fitting, generous overhang proportions, integrated lighting, and clean, uncluttered surfaces.
Which Materials Work Well for a Luxury Kitchen Island?
Popular premium materials include natural marble, quartzite, solid white oak, black walnut, unlacquered brass hardware, and custom plaster detailing.
How Much Space Should You Leave Around a Kitchen Island?
Leave at least 36 to 42 inches of open walkway around all sides of an island. In high-traffic areas near main appliances, 48 inches is recommended for optimal comfort.
Is a Waterfall Kitchen Island Worth It?
A waterfall island may be worth considering if you want a strong design feature and like the look of continuous stone. Before choosing one, compare fabrication costs, material requirements, and maintenance needs with a standard island edge.
Can a Small Kitchen Have a Kitchen Island?
Some small kitchens can accommodate a compact island, but it depends on the room’s dimensions and layout. Measure the available space, check appliance access, and keep suitable walkways clear. If an island makes movement difficult, a peninsula or movable prep table may be a better option.
Should You Put a Sink in a Kitchen Island?
Adding a sink is ideal if you want an interactive prep zone that faces guests. However, if you prefer an open, uncluttered surface for serving and dining, keep the primary sink along a perimeter wall.
Conclusion
A well-designed kitchen island balances elevated aesthetics with daily practical utility. By choosing tailored materials, comfortable seating, and smart internal storage, you can create a central feature that transforms how your kitchen looks and functions.
When exploring these luxury kitchen island ideas, select layout strategies and finishes that complement your home’s architecture and lifestyle. Focusing on quality craftsmanship, proper scale, and harmonious finishes will ensure your island remains a stylish centerpiece for years to come.